A Warp It feature often overlooked, but proven to be very popular, is the capability of setting up sites, campuses and even departments on the system.
NHS Trusts, universities, blue light organisations and councils will usually have more than one site or campus and are often spread across a town, city or in some cases regions.
Warp It will ensure that the location of the items you've added to the system can be easily be identified, making life easier for members, those in charge of transporting the items and admins.
Read on for guidance on how this can be done.
First step - adding your sites or campuses
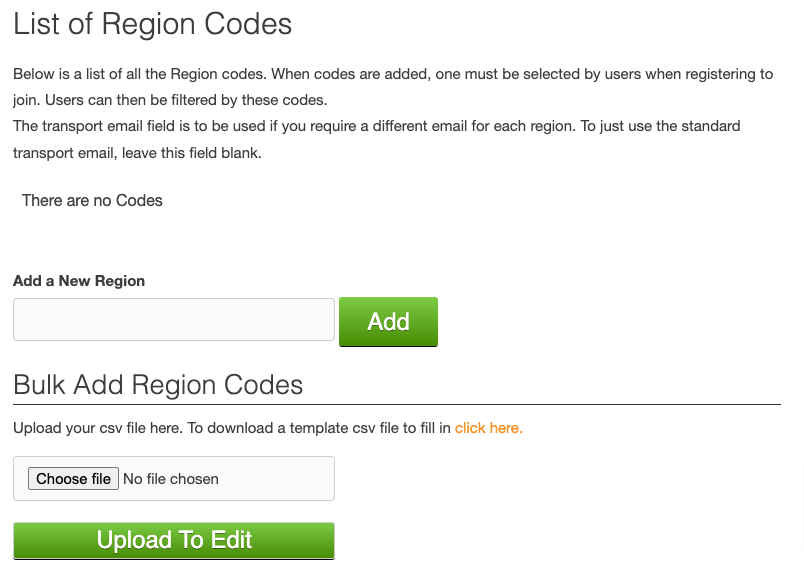
Log into the admin portal and go to the blue box titled 'Settings' > 'Edit profile' and scroll down to the section headed 'Region/Campus Set Up'.
Here you can add your locations one by one, or you can add them to our template CSV and upload them.

Next: setting up departments - this is an extra bonus
Go to the blue box headed 'Settings' - 'Edit profile' and scroll down to the section headed 'Department Set Up'
This looks exactly the same as the above section for setting up campuses.
How does it look now?
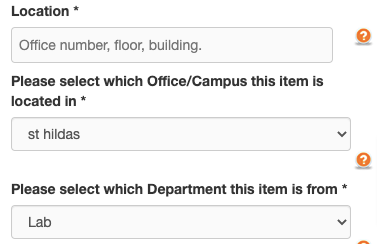
Now when you add an item you will see new dropdown option boxes appear, for members to choose from the list you have added.

Active item list view
When you view items in 'Active Items' you will see the location now includes the sites or campus details.
Reporting options
We've also ensured you can run reports to show the performance of each region.
Go to the blue tab headed 'Reports' > 'Transaction Reports', and you will see a new filter that allows you to download the savings for a specific site/campus. You can also view the savings performance overall by going to the 'Internal League' option in the Reports tab.
Need help?
To book a screen share session to go over this feature, or any other Warp it features, please get in touch and email becky@warp-it.co.uk.


