When staff from the reuse team move on what happens to their Warp it account and the items they have listed?
It is the admin's responsibility to manage this.
This guide explains how to transfer items in bulk to another user.
Log into the Admin account.
Go to ‘Asset Settings’ and ensure ‘Allocate admin items to user’ is enabled.
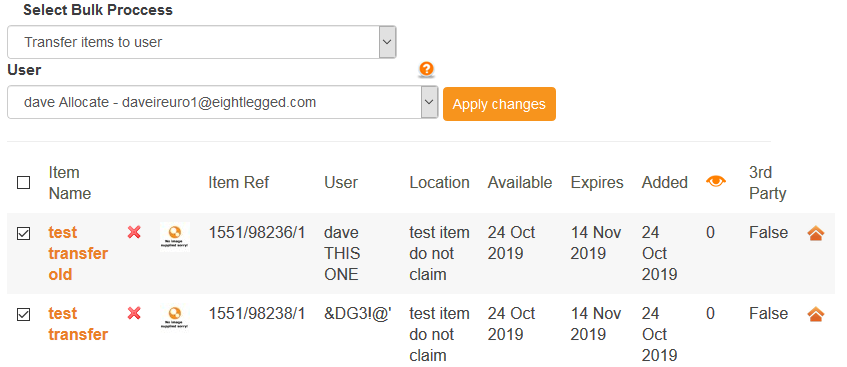
In the admin section, view items in list view. See image below.
Tick all items you want to bulk transfer, and click on the drop-down menu for ‘Select Bulk Process’.
Choose ‘Transfer Items to User’, and in the ‘User’ box below, select the user to transfer items.
Click ‘Apply changes’.

The items will be sent to that user and you'll receive a confirmation message stating ‘The selected items have been transferred to the selected user: NAME, EMAIL ADDRESS.’
If you want to transfer single items go to the Company Account, and ‘Settings’.
Then go to ‘Control Assets’ and enable ‘Transfer Admin Items To User’.
Go to active items and choose the individual item for transfer to someone else.
Because you have enabled the transferring of admin items to a user, you’ll see a new box and drop-down list on the item page that allows you to choose which user will be receiving your items.
Choose the user from the drop-down list and click the big green ‘Transfer To User’ button.
You will be redirected to a confirmation page which will show you the new owner’s email address, telephone, and item details.
An email will be sent to the user and the admin confirming this transfer.
See below.

Need help?
To book a screen share session to go over this feature, or any other Warp it features, please get in touch and email becky@warp-it.co.uk.


