This feature allows the allocation of uploaded assets directly to an internal member, or an external partner, saving a great deal of communications time in the process.
Here's a guide on how to use this feature.
Sign in to the Company Admin account.
Once signed in, go to Settings and then Control Assets.
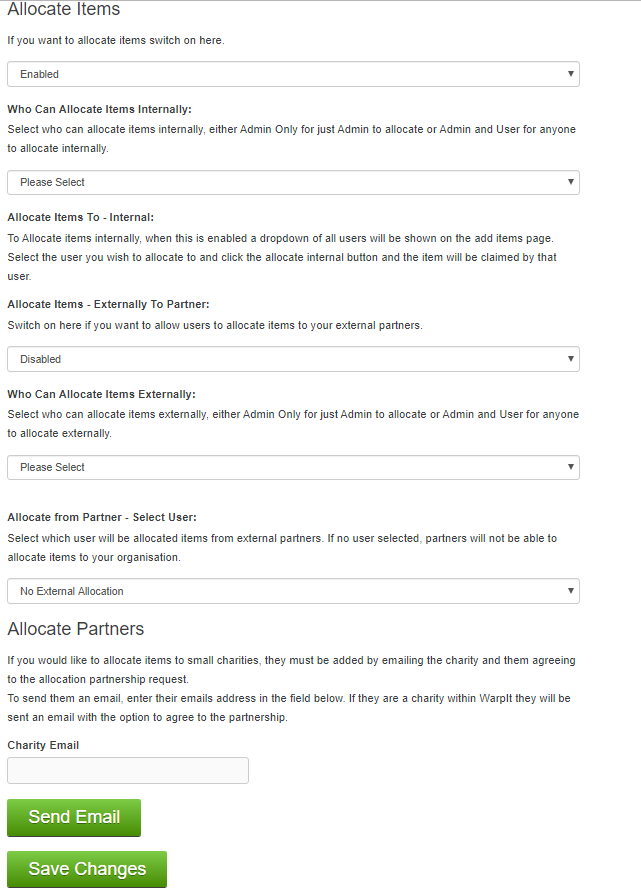
Scrolling down this page, you'll find a section entitled ‘Allocate Items’, beneath which is a drop-down box.
Change this box to ‘Enabled’, and click ‘Save Changes’.

Once the drop-down box option has been set to ‘Enabled’, you'll see the ‘Allocate Items’ section.
This offers controls for who can allocate items internally.
Admin can now decide whether this will be an Admin-only activity or if others are permitted to make allocations too.
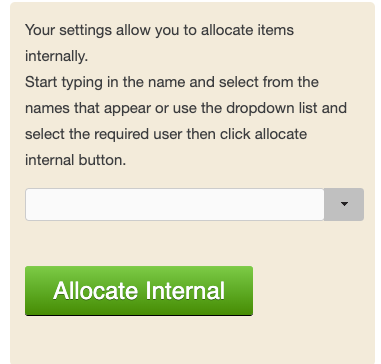
When allocating items internally has been enabled, a dropdown list of all internal users will be shown on the ‘add items’ page, where items’ details are added during an upload.

Once you’ve filled in the details of your item, you'll need to decide whether to allocate the item to a specific user or not.
On the right-hand side, a drop-down box will show you all of the Warp It users in your organisation.
If you choose to allocate an item to a particular internal user, they will receive it as a claimed item.
Once this has happened, both the item owner and the allocated user will be notified by email with the details of the transaction and they can set the claim as delivered or collected to complete the transaction.
Alternatively, the allocated user may reject the allocation and in this instance, the item will go live as a normal listing.

To read about external allocations and allocations to charity partners, please use this guide.
Need help?
To book a screen share session to go over this feature, or any other Warp it features, please get in touch and email becky@warp-it.co.uk.


